Monday, April 3, 2023

Paymaster's Payback Pt 2

 After tricking a living statue into falling down a pit our intrepid warriors continue on in hopes of a big pay day!


A simple T-Junction leads out from the snowy field with only one icy room behind it.


In spite of allegedly being able to read we had forgotten that the only monster's we were supposed to not encounter would be ogres per the adventure rules, oops!  This must just be  the mastermind behind the fall of the paymaster's lair, that's it for sure!  The Room contained an ogre bull and his gnoblar friends.


The outlaw heroically leapt into the fray hoping to cleave through the gnoblar's however he only manages to hit one and stand there like a fool.


This results in learning a lesson about the gang up rules and just how much they hurt!  Don't worry he got better...


It takes a few turns to whittle down the ogre and even the brewmaster goes to zero wounds at one point but eventually the task is done and our first ogre is taken out of the picture!  For our troubles we gain a Blood Chalice which can be used as a power source however for each point of power taken from the chalice the spellcaster loses one permanent wound until the end of the adventure.

After much debate it was later decided to sell the accursed artefact.


Heading back to the snowy fields door number two contained another T-Junction with just one room leading off of it.


This dead end just happened to have yet more evil artwork in the form of a Darkness Statue.  We quickly decided not to mess with that room however...


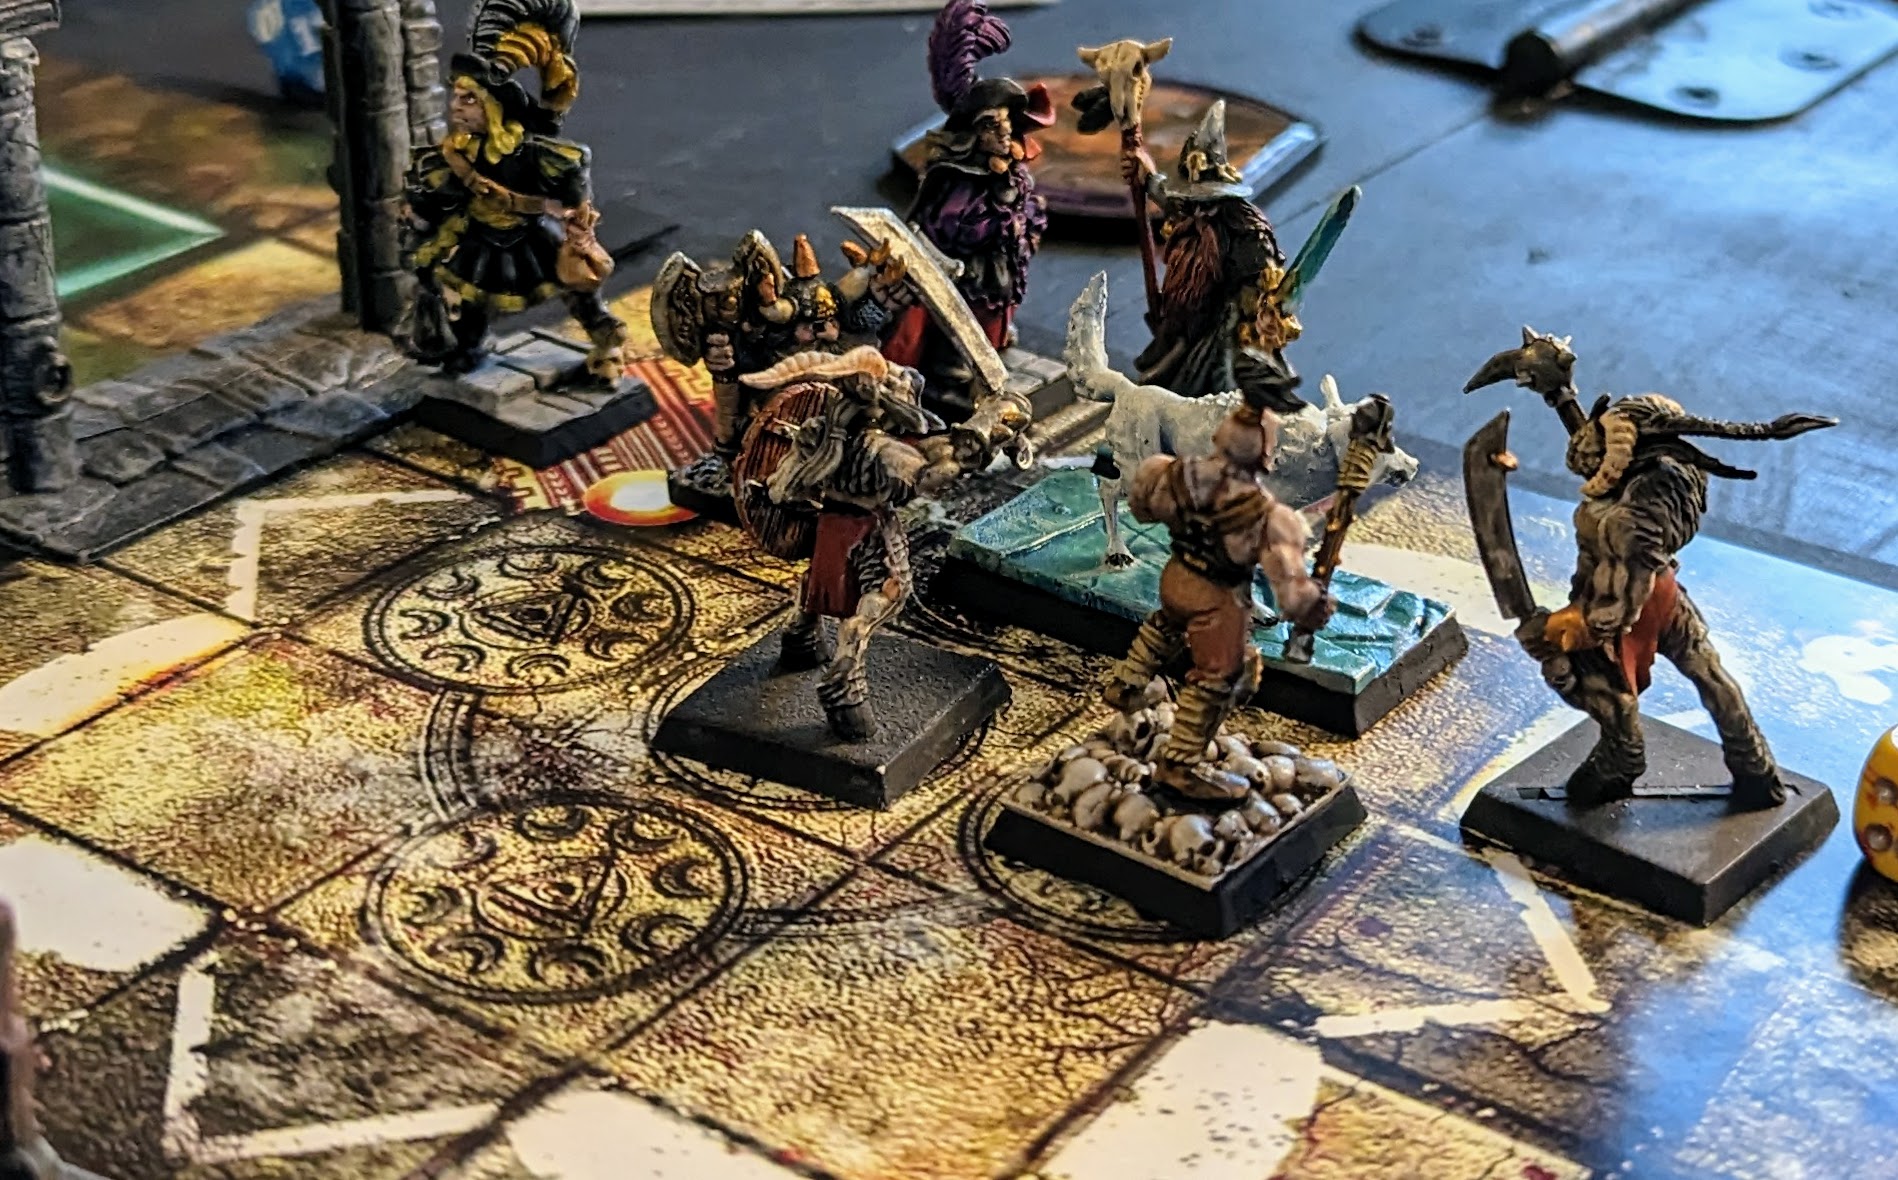
The dungeon was happy to mess with us as we rolled an unexpected event watching four nurglings sneak up behind us as we ponder the paymaster's art collection.  Being armed with magical weapons we made short work of the tiny sacks of poo

As a reward we find 10 Throwing Daggers of the Eagle, a Tzeentchian item that for each dagger that hits a monster takes damage in the power phase equal to the power roll with no modifiers.  A perfect collection of daggers for the Outlaw to use later.


With no other options remaining we were left to cross the frozen river in search of the objective room and an exit.


The outlaw still had his luck point so after handing one end of the rope to the dwarf and tethering the other to himself he made the leap to the first ice block easily while the Shaman created more floating platforms to easily make it across.  On the other side the rope was tied to make a makeshift bridge line and make it easy for the rest of the party to get across.

We now had no rope however so any pitfalls would be instant death!


Opening the next door we encountered a perfect Easter surprise as a rolling boulder trap was released with everyone on a precarious icy ledge lined up for a perfect strike!


Only the swashbuckler managed to somehow dodge the boulder with everyone else taking damage.  At this point we begin to ponder why the paymaster never bothered to warn us about the plethora of traps that he had left in his lair to maim, crush and smash our poor party.  

The giant egg smashed into the far wall revealing another room but we soldier on laser focused on our real goal, the paymaster's chest!


Beyond the boulder trap we find the objective room!  It's time to pray to the dice gods of old that our streak of terrible luck is finally over.


We roll three rolls of equal level monsters (not at all that bad!) first up is a wolf.  Being cavalry it has to start out of line of sight which just so happens to force it to make a leap over the river.  The poor dogo promptly fails this roll and falls right in (falling monsters really is the theme of this dungeon)


This left us to deal with 3 beastmen, 6 ungor and 6 harpies!  The ungor with their skirmish rules still setup in close combat with a few out of range to use bows for now, they will also have the threat of reinforcing bringing their numbers back unless we can quickly dispatch them.

The harpies are yet another layer of danger as they have the harass rule meaning they will stay two squares away and attack with their reach 2 ability, quite annoying!


The brewmaster downs some of his best ale and powers up like a drunken Popeye, deathblowing his way through the ungor with his goblin poker spear.  The harpies aren't the only ones with a reach weapon!


As the outlaw continues to fail to hit and finish off a beastman at one wound the harpies attack back downing all but the kislevite who is left to heal the party!  Needless to say we are running low on healing potions at this point.


The theme of missing attacks breaks after a few rounds but the jumping jacks of going to zero wounds does not!   We ask only for a chance to hit and smite our most hated foes who poke and jab us to the death!

The brewmaster again responds smacking the harpies out of the sky along with a shot from the swashbuckler!


With only one beastmen left we quickly acquire the paymaster's chest after a long hard fought battle.  It is time to finally find a way out of this Gygaxian nightmare of a dungeon.


Sure enough the next room is the chamber of mists which leads to the final card, the spiral staircase (our only exit!).


again a horrible piece of evil artwork has been left here but we have no choice, we must test the merit of it's artistic worth!


Nine ghouls leap from the shadows to convince us that the wizardly statue is beyond our understanding both aesthetically and artistically.  It doesn't take long for us to tell them how uninterested we are in purchasing their statue and we finally clear a path to the exit!


On the way back home we encounter another blizzard and a sacred grove for the Kislev Shaman to train up to level 2!

Back at the city we cash in our paychest by giving it back and taking the objective room treasures.  The outlaw gets the Etherion quiver, not having a bow he sells this.  The Swashbuckler gets a Daemon Frost Bite Revolver which deals chill damage, lowers enemy movement and drops their to hit value by one for each hit!

The Brewmaster scores the Dolorous Blade of Bretonnia somehow boosting his killing power by a metric ton!  Finally t he Kislev Shaman finds a Brooch of power to store some excess power.  Overall a very big pay day indeed.

Everyone levels up now gaining new skills and stats (soon we will even name them so we can get attached when they die).  The Outlaw is quickly challenged to a dual and skips town, the Shaman finds  an epic quest (more on that next time) and gets swindled in the tavern and we stock up on a few supplies (including new rope!).

Join us next time as we take on a very special tribe of marauders.

Friday, March 31, 2023

Paymaster Payback pt 1

 After our last failed venture to the sewers we stocked up in town buying more healing potions and found a worthy new companion in the form of a dwarven brewmaster!


As always the rules we use can be found right here.

While hovering around in the tavern our shaman actually encountered an ogre paymaster who had not only lost his lair to a monster invasion but even his tribes paychest!  Sensing a chance to make some real money we jump at the chance to retrieve (or steal) the chest!


After a journey through blizard, campfire legends of a dangerous fiend of slaanesh in the next objective room (3+ chance!), an obvious trap of treasures in the snow and a dwarf prospector who gave us the key to the portculis we arrive!

First card is the ice chute which is going to make getting out of here less of an option if we need to...


And it drops us directly into a warp gate which spawns a bloodletter with double wounds and a Gift of Khorne!  It receives the gift of +10 Attacks however it only hits on 6's and gains impervious defense meaning we can only do a maximum of half of it's wounds in damage each turn.

After the first turn the bloodletter fails to hit with any attacks (whew) and gives up on being in this dimension after our subsequent beat down!


Next room is the Ogre Lair which will give us the key to the objective room as long as we can contend with a few marauders and beastmen!


After a few quick rounds we dispatch the chaos incursion and pick up a shiny new key for our efforts.  So far all the treasures have tended to be on the, cute but I'm going to sell it when we get home.  Nothing of note really found.


The ice pond is behind the next door along with 12 giant bats.  The bats aren't much of a worry but there's a small chance each round of falling in so make sure to practice those rolls for the end of your turn!


Peaking through the next door we find the frigid river.  We debate for a bit but realize that no one else bought a rope and if we permanently tie off our only rope that could lead to disaster later, let's try door number 2:


The magical floating stones of doom room it is!  Quickly after a few scary jumps our shaman realizes he has floating platforms he can summon to trivialize this room for us.


What he loses in damage at this level he more than makes up for in stoping us from cliffdiving for fun or profit.  Little did we know that this room would be our greatest ally this session...


The next room is nice and simple just a snowy field, however there's a statue in the corner that just might wake up with the spirit of a stone troll, with Ignore blow(4+)!


We roll up monster's again and get one centigor, a fairly nasty monster at level 1.  Thankfully he's a cavalry type monster so he has to start out of line of sight and charge in, right over the floating stones.  He doesn't seem to find his hoofing on the stones and falls right in saving us the trouble.  


Our pretty statue friend however immediately comes to life.  This is a nasty enemy normally but with half our our attacks that hit being wasted means we are in for a fight.


And fight we do causing chip damage after chip damage and watching his 2D6 regeneration bringing him right back to full.


Even after going were-wolf form and summoning another wolf we are no match.  We can't break through the regeneration and this thing is beating us senseless!


After 10 or so rounds with the stoned stone troll we sacrifice the wolf and run back through the floating stones (again those magic platforms are lifesavers).  The statue runs after us after dispatching the wolf but realizes his wings are not flight worthy and falls down below with all his gold...

Being bedtime for my little one it was time to call it here and continue next session.  With no clear way of escape from the dungeon yet we have no choice but to soldier on!


Sunday, January 29, 2023

Sewer Level!

 When we last left our intrepid heroes they had saved the town from a bunch of green skinned squaters (oof that doesn't sound heroic!) and the dwarf was crippled by a whoping -3 permanent toughness penalty from plague bearers!

As a house rule no warriors are to be named before BL2 to avoid getting attached.  As such, the dwarf is being retired and replaced by a shiny new dwarf!  Be not confused as to why this new dwarf looks the same, likely they are twins and this is some kind of parent trap situation I'm sure of it.


As always the rules we use can be found right here.


Everyone restocked in town, did a little gambling and bought as many healing potions and gear as we could with out surprising amount of gold gained (over 500 per warrior from a starting quest!).  We did encounter a slight issue with the swashbuckler having to knock out a random barbarian in the tavern.

We did flub the rules a little after having started on an old world starting quest we decided to relocate the town to Norsca to try out the new expansion.  As such buying a few fur boots and ice spike shoes were essential to avoid some frostbite and stay standing in the ice caverns.

This would all be pointless as our first quest was in the sewers below town: Forgotten Temple, Quest 1:


Per normal operations the skaven have been building war machines beneath the city streets and are readying for a surface invasion.  The city watch know of this and are readying to wipe them out right away.  The engineers guild however have asked the warriors to steal the bluepritns for the skaven warmachiens first before the watch enact their scorched earth policy!

Like a good child my son rolls for the number of turns we get before the watch begin 'helping' (2D6+4.  He gets a roll of 4 leading to only having 8 turns to get in, steal the bluepritns and get out!  If the city watch catch us down here they will consider us traitors and should we slay them we'll only be proving their point.


The good news is we roll up a War Party side quest for the smugglers den meaning that there are 3 extra cards added on to this room with the guard room containing explosives.  In theory we should get these explosives to blow up the boat and stop enemy reinforcements from coming whenever the event die rolls a '1'.  However the shaman has the bright idea of leaving it be meaning when the watch come down on us there's a 50/50 chance they have to clear out that passage first buying us some time!


We find the leaky room next and promptly roll up an unlucky double encounter.  Since everything in this dungeon is skaven you'll be seeing a lot of rats down here.  This time we get a few clan rats, some giant rats and worst of all nine stormvermin!

The biggest change made to the dwarf for this version is the inclusion of his taunt ability which allows all adjacent enemies to not only be forced to target him but have a 4+ chance to be mad and suffer a -1 penalty to hit.  This would prove invaluable through this dungeon yet again.


The shaman started of summoning a wolf and a few clanrats and giant rats went down (several jumping right into the wolve's open mouth with deathleap!).  However combat would soon grind to a standstill when the stormvermin stepped in!


With only four turns remaining until the city watch comes down to 'solve' everything the dwarf finally manages to get a lucky set of deathblows and cleave a swath through the stormvermin!  The amount of bad to hit rolls that this party gets during this session is unbelievable and stalled us out in every combat!


Two turns later despite holding out for some time while taunting nearly all the stormvermin, the dwarf goes down!  Unlike his predicessor though there's not plague effects so he is quickly healed before being brought low again then ext turn.

We call this dwarf jumping jacks!


So most of the way through our very first combat the city watch barge into the sewers!  There are 7 BL2 barbarians.  Our two saving graces are the extra passage way formed by the Smuggler Side Quest and the fact that the leaky room locks both it's doors as soon as the monsters spawn!  Now the watch will have to explore the three rooms on the other side of the docks before they can come say hi to a few adventurers who really shouldn't be medling in this affair.


While we continue to fail at taking out the last stormverming the city watch break down the door to the guard room and immediately encounter a Wolf rat that charges in being a moderate threat even to a party of 7!


As the Wolf rat sat outside attacking the watchmen piece meal it manages to take one down.  At the same time we finish off the stormvermin and move deeper into the dungeon.  Keep in mind at this point the only exit is the spiral staircase so we are soon to be locked into a battle to the death with the watch should an escape route not be found (this would brand us as enemies of the town for sure!).

After clearing the leaky room it unlocks and we gain a Goblin poker (reach 2, double damage against goblins) and  an ornate rusted armor (+3 armor but -1 movement)  We consider the armor but advised against it favoring speed instead.


Good news then because the next card was the Spiral Staircase which per the adventure rules causes us to draw the next card and attach the stairs to it as an extra room.  


The watch continued to hack the wolf rat down to 9 wounds now almost as an artificial clock.


So running into the temple means attacking the majority of the skaven invasion force.  Which in this case are 5 clan rats, 10 giant rats, 10 skaven slaves and all lead by one assassin!

Nothing in this room is all that concerning except the assassin (note its not a gutter runner but a full on assassin!).  This guy does 2d6 damage, has two attacks and with his assassinate ability can ignore both armor and sometimes toughness!


This may be a bad sign though as we go back to the watch who have defeated the wolf rat.  Though it did eat two of them they are still a formidible force, hopefully something in the next room will slow them down.  The ral hope is that monsters do away with them leaving us free to complete our mission.


We take out a few of the riff-rats but it isn't long until the dwarf is brought to zero wounds from the weeping blades suffering -1 Strength permanently! Only a turn later the summoned wolf is eliminated as well.  This battle caught us chugging healing potions left and or right to stay alive!

Meanwhile the City watch proceed through the Slime Channel to find some old bones.  Much like the armor stand in the guard room they decide to just leave it be and continue on their raiding way!


In an attempt to cause some damage the Shaman turns into his Were-Wolf form while we continue to try to survive the assassin's onslaught.  Every so often we get lucky and hit the dodgey thing causing minor damage while also clearing the giant rats and slaves.  I wasn't kidding when I said our luck was HORRIBLE this whole dungeon when rolling to hit!


The city watch finally make it to the end of the passage and encounter a few giant rats, so much for hoping the dungeon would take care of them!  Over a few turns they destroy the rats (or the rats jump on their flails with deathleap either way works).


Finally the shaman strikes the final blow on the assassin and calls forth another wolf.  Now we can just mop up the enemies and get out of here!


Though our rat friends managed to wound the city watch there was no way they would stop them at this point.  After clearing out the enemies in the temple it was clear that we should cut our losses (ie tons of healing potions!) and flee.


But not before we do a few more jumping jacks!  The dwarf and outlaw both go down due to our supplies being low and healing spells just not cutting it against the overwhelmingly bad to hit rolls.

Everyone survived and we did get lucky on the treasures from this encounter since everyone received a dungeon room treasure!  By the end just about everyone got a new present!

The outlaw picked up the Muck Dweller sword which grants him +2 strength and if he's in water or slime +2 to hit! as well as gaining from another warrior Verminous Furs granting +1 Toughness but all skaven gain the hatred rule against him.

The Dwarf Gained the Blood Drinker Sword which whenever it causes damaged deals -1 permanent strength to a montser and can even heal back his lost strength!

The shaman gained an elven dager granting +1 attack as well as regaining his stolen cloak (apparently the Assassin had it!) that was stolen during the end of the last adventure. perhaps the Verminous fur's the Outlaw took were an act of revenge?

With out tails firmly between our legs we get out of there leaving the city watch to wonder who cleared out the skaven in those two rooms?